Here is a quick breakdown of how I made a padded armor piece for the character Tilly when she's her D&D character, Tillius the Paladin, in the play, "She Kills Monsters."
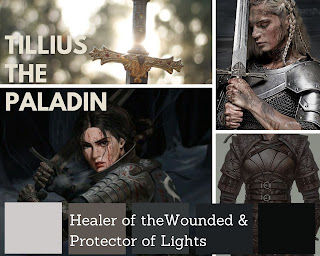
For reference, here are my Tillius the Paladin Mood Boards:
First step was using the actor's measurements I created a very basic front and back bodice pattern. I wanted the armor piece to be comfortable, slightly bigger, and the padded would provide the texture look I was aiming for with the overall piece. It would be worn over a long sleeve t-shirt and the actor would be wearing a belt over it that held the sword. Also worn over top would be a one-armed shoulder armor piece that would be black leather with silver accents. So, while a majority of the outfit was black (base layer, boots, belt, gloves) I wanted this armor piece to be more grey and scream texture to the audience.

Above: I cut out the front and back pieces in the grey fabric for the outer layer as well as striped fabric for the lining (I made the striped fabric slightly bigger all the way around than the grey fabric).
Then I cut out a padding piece using the same pattern piece. I set aside the striped fabric for later, I would do the lining after the padding was secured.
After pinning the fronts together, I serged along the entire outline of the bodice piece. I then did the same for the back bodice piece. Now I had one front piece with padding and one back piece with padding.
Above: After serging the padding to the grey fabric I used a two inch wide ruler and marked diagonal stripes along the front and back pieces. using tailor's chalk Then I used pins and pinned the fabric so that it wouldn't slip, despite the padding & grey fabric being attached by the serging. Then I stitched along every line I had marked with chalk. This would give me that textural look I was hoping for without using additional materials.
Above: This is what the front looked like after stitching along the chalk marked lines. Once all of the lines were finished, I would then pin the striped fabric lining to bodice pieces. Then I serged the outer seams like I had originally done with just the padding & grey fabric.
After this I would then pin the shoulder seams of the front and back bodice piece together. Due to the thickness of both pieces, I elected to hand stitch the bodice pieces together using black button & craft thread. Once the shoulder seams were stitched together I then sewed one side seam together. I left one side open until I could have a fitting with the actor playing Tilly. That way if anything didn't fit correctly, I could make changes without adjusting a zipper.
Above: This is the armor piece without a side zipper. It fit the actor really well and allowed them to remove it easily (yay quick changes!) and gave them the movement they needed for fight scenes. After the fitting I sewed a grey zipper to the open side seam and used the same heavy duty button & craft thread and elected to hand stitch it in place. Overall it turned out to be a great "fake" armor piece and it looked amazing with the rest of the costume.
The Final Look:


Comments
Post a Comment