With everyone making home masks at the moment I thought I would do a little tutorial on the ones I have made specifically for myself. I looked at a lot of tutorials and different patterns online to construct a mask that worked for me. I wanted something very simple both time wise and material wise. Let me know if you have any questions!
Warning/Disclaimer: This method is not industry tested or anything, it is simply a way of making a face mask using 1 piece of fabric and 2 pieces of elastic. It's just a tutorial, intended for educational purposes and nothing else. The decision to use this as a method of protection against pollution or viruses is solely your own. Please consult the Centers for Disease Control and Prevention's (CDC) website for updated information about home made masks and their effectiveness.
First Step: Select your fabric. Check the CDC's guidelines for recommended fabric types. I ironed out my fabric choice, marked a piece 8.5 x 16 inches, and cut it out.
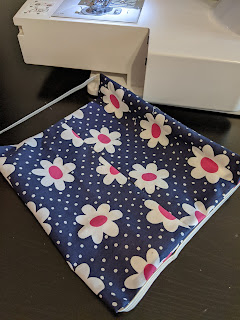
Take your piece and fold it in half with right sides together. Sew along the top edge with a 5/8 inch seam allowance, leaving a 3 inch opening in the middle for a pocket (if you're wanting to add a filter you'll leave this open). If you choose to not add a filter you can sew this shut later on towards the end.
Here is the picture of the top sewn with the opening. Press your seams open as shown above. Think of this seam as your "front" (facing you) middle. Switch gears and cut 2 pieces of elastic, 7 inches long each. Now it's time to pin the elastic. Pin one piece of the elastic to one side at the top corner and then the other end of the elastic to the same side bottom corner. Pin the other piece of elastic to the other side. Sew the sides of the face mask together with a 5/8 inch seam allowance - be extra careful to not sew more than the edges of the elastic you have pinned.
Now you have your elastic sewn and your side seams sewn. Turn your mask right side out through the pocket opening you created earlier. Your mask should look like the one pictured above. A rectangle with two elastic loops for your ears. If you want to add a filter now is the time to slip it in that pocket before you add pleats. If you don't want a filter you can just add a little zig-zag stitch over top of the opening to make sure it is closed. It will most likely get closed with your pleating, but it is better to be safe and not have an opening if you're not adding a filter.
Next is the pleats! Now you need to fold three evenly spaces 1/2 inch pleats, making sure they all face the same direction, and pin them in place. Sew along both edges of your mask to secure the pleats in place.
And now you have a pleated face mask!
Out of habit I ironed mine after I sewed the pleats.


Comments
Post a Comment